Wednesday, January 1, 2014

Happy New Year!

So long and no update. The paddling season was a great success! I paddled from October 11th to November 20th, nearly a month till solstice. My last paddle was on a Friday and when I went back to Cootes Paradise on a Sunday, it was frozen to about a half inch at the shore and about 80% covered. I could have continued to paddle but my lack of recent challenging experience as well as my lack of paddling partners has stopped me from venturing out into the lake... so far. I've seen some nice calm days that are just begging for a qajaq on the lake.

www.wolfgangbrinck.com
In the meantime, the insatiable bug that comes with creating such beautiful crafts has bitten me once more and I seem to be devoting more and more of my thoughts to the construction of the Aleutian kayak, also known as a baidarka as the Russian's called them or an iqyax to the Aleutian or Unangan people. There are a wholly different animal from the West Greenland qajaq. The West Greenland is a hunting vehicle for the relatively calm waters of the fjords of Greenland. Its lines are in my opinion, the most beautiful a kayak or any vessel can have. There symmetry and simplicity are awe-inspiring. The baidarka has been seen as an uglier vessel, at least at first glance. It's a bit bigger, rounder in hull and the ends are most peculiar. The stern is quite square, as it enters the water and the end of the deck. The bow is the most striking feature though. It is traditionally bifurcated, or two pronged, stacked vertically. No one is quite sure why. Some are not and have a 'normal' bow. There is little difference in performance but I think I'll go the extra step because it will look awesome. The picture here is Wolfgang Brinck in his baidarka. I will be using his book, "The Aleutian Kayak" as my main resource for this next project.

Since it is snowing now and I have no large indoor space, I will probably be focusing on the much more complex bow and stern pieces and collecting winter willow for the ribs. On my West Greenland kayak, affectionately know as Gemini, the gunnels met at the bow and stern making it very easy to line them up perfectly for symmetry. The gunnels on a baidarka never touch but meet at the flat piece of the bow or stern. I will try to find some good willow shoots, about 1/2 inch wide and 30 inches long. I'll need forty of them and winter is apparently the best time to collect them for optimum bending capabilities. I'm quite excited about this aspect because this should noticeably be able to absorb shock more readily than my oak ribs on Gemini.

And now here's a picture of Gemini without her clothes on! Happy New Year!

Friday, October 11, 2013

The Maiden Voyage!

After hemming and hawing about paint and it's qualitative properties, I finally got the kayak in the water! I couldn't be happier! I went for a short paddle in Cootes Paradise on the far west end of Lake Ontario, tucked away from the rest of the lake by the 403. It's fully green on its shore besides the small strip of highway ripping along one side separating one in the "Paradise" from Hamilton Harbour. I saw one deer, innumerable herons, ducks, swans, cormorants, an osprey, a couple of turtles and a dragonfly. It was really quite an abundant ecosystem, I'm looking forward to many more paddles there and on the other side as well as some of the creeks up and down the lake!

The kayak was amazing. A little tippy at first and I've got to figure out the smooth entry and exit still but I'm not worried. She cruised as straight as an arrow and just as silently. She felt the best heading into the wind and seemed not to weathercock in waves though it was incredibly calm with waves reaching as high as 3 inches! I'd like to get out in some bigger waves and see how she travels in that.

I've also added the fore and aft deck lines with some shock cord and pieces of cedar. I'll add photos when there is more light, probably my paddle tomorrow! Also, the Fire Red paint has yet to be tapped, the name (Gemini) still needs to kiss the bow and perhaps some designs shall be sprawled on her skin still.

Monday, October 7, 2013

A new home and waiting paitently for painting weather

I'm waiting for some sunny dry weather for the rest of the painting now. Patience comes easily here because I want this kayak to be awesome more than I want it to be done. So what have I done with this restless energy while waiting for the winds and waters to change? I made a new home for my kayak, where it can be beautiful but barely noticeable to the untrained eye, hidden yet accessible. I've hung it from the roof of my front porch using some eye boltings, rigging rope and an 800 lb hand winch from Princess Auto. Because honestly, where else but Princess Auto does one go when looking for such a thing?

I had some terrible rope at first that stretched right out but then on buying better rope, the system worked perfectly. It is really quite simple. I made two holsters from keel cut-offs and put a piece of rope through them that attaches to the hoisting rope via a caribiner. The hoisting ropes, one for each end go through an eyebolt in a joist, back to the stern of a kayak through a shared eyebolt and then down into the winch which I've "hidden" on the backside of the column there. It's a terrible photo here but also the tree to the right hides the ropes from street view as well and you can barely see the black stealth form of the kayak in the top of the porch. Should be nice and dry for the winter!


Saturday, October 5, 2013

Skin and Paint!


 What an exhausting weekend! Saturday's here and I'm already exhausted. It took me all of Thursday and Friday to get the skin on. The long seam down the middle is so slow. It took me an hour to go about two feet at the most. It then took me another half day to the cockpit sewn in, quite daunting as my masik is pretty arched, so the hoop is actually at quite and angle and has to pick up fabric that is already really tight around the masik. Since I messed up on the bend and ended up using smaller stock than is called for this is a little worrisome as it could break or just not hold enough tension in the skin. But I used canvas so I can replace it and reskin it later if I do so choose!
And I got to the paint today too! This is expensive marine one part urethane from interlux. Boy, did that canvas suck alot of it up right away. There's two cans right there, a litre each, both top and bottom, one coat done. I'm switching to Tremclad because they're out of this paint colour at the boat store, it's expensive anyways, the guy at the boat store used tremclad on his skin--on-frame 25 years ago and it's still good and it's canvas so I can reskin later if I don't like it!


Wednesday, October 2, 2013

Gemini sits on Orion's shoulder

October is here in fine fashion, blazing sun in the afternoons with that warmth of summer still in our hearts. The days are getting shorter and I can see Gemini with Jupiter sitting on Orion's shoulder when I make my morning brew. I work on my kayak deep into the dark, cherishing every drop of sun. I finish without being able to see her in the full light of day so I don't get to fully see what I have done until the afternoon comes around and I roll in from work, eager to start the real work. I go to bed tired and smelling like oak and cedar, maybe some citrus and oil, exhausted but I've never felt so energetic and alive. This boat is the finest thing I've ever created, I've worked every piece of wood, bled on it, sweated into it and spent far more time with it in my head.

Tomorrow is the two month mark of the project and by golly do I have something for my efforts. Today, I finished sewing/lashing the cockpit flange to the main hoop and gave it an oil coat and gave the rest of the frame it's second oil coat. Yes, nary a blog post doesn't mean no progress, nay, greater progress than ever before. Tomorrow, she shall be ready for her skin! A skin to put on, sew the cockpit hoop in and coat of paint is in the works and then, technically, she's ready to paddle, though I plan on three to six coats and then I have to do decklines but those can wait.

 So what was I doing in these last two weeks? Pretty much the rest of the wood work. The ribs are all in, the keel laid straight and true with the two chines laid down to accuracy within a eighth of an inch, all lashed down in some beautiful running lashes. One piece of lash, runs along each stringer in such an elegant and simple fastening. In a minimal amount of turns, it tightens the previous one while holding itself true and once started, finishes quickly. It's really quite astonishing. Plus, once all the runners are hugged closely to the ribs, the frame takes on a real stiffness or oneness that really makes her feel like a boat.

The next was the deck stringers, floor boards and masik. The floor boards took two whole days because they need to be shaved to that they fit under the skin. This was not an easy task but it did reveal that one chine was off by more than a quarter inch in some places and needed to be redone. A nuisance but I should have done it right the first time. The masik was a glorious find. It is possibly the most important and difficult piece in the boat. It needs to be naturally curved or of laminated straight grain. I had a feeling my steambending plan was dubious at best. So last Sunday I was down at the Ottawa St. antique stores when I found an old yoke! Perfect! I grabbed it and practically ran home to notch it out and fit it in. It's perfect and it really finishes the qajaq in style!


The only other thing was the cockpit hoop which took two steambends and another lash where I used approximately twenty four feet of artificial sinew! This piece is just another fascination to me. A year ago I shuddered at the idea that I'd have to do that if I wanted to build my own kayak. Now, with relatively little 'live' instruction, just a book and a couple youtube videos, I have created a kayak with twenty seven pieces of steam bent wood, all done within quite acceptable accuracy (well, we'll see when we get this on the water).

With life's hilariousness, I have been given a four day weekend! What perfect timing to skin, paint and rest! I might even have her in the water by Sunday! Soon my weekends will be filled with this kayak on the roof of my truck and then in some wilderness lake! Who wants a paddle partner!

Wednesday, September 18, 2013

Ribs, Stems and a video clip!

I've finally got all the ribs in, most of the wait being due to the soaking period of
the wood. You should bend very wet wood, pretty much fresh out of the ground wood, not the kiln dried stuff you get at Home Depot. And you should soak it so it can be really limber with a good sauna and do whatever yoga you want it to. However, if it's wet, then it does not cut and shape well under the saw. So I have to know which ribs need replacing and hence, time delays all over the place. I don't mind though because there's stuff you can do in the mean time!

Since the last post, I've cut out the keel and the two stringers that define the chines, tapered them and sanded them down. I've cut out bow and stern stem piece that define the cut water to the boat and I've ripped and sanded and started to soak the wood for the cockpit coaming as well as an experimental piece for steambending the masik! For anyone who actually has building experience, please let me know if steam bending a 2.5" x 1 3/16" x 24" piece of oak and using that is a bad idea. Would it be strong enough?

I really enjoyed getting the keel and stem piece done. With them clamped in place you can really see the shape of the kayak jump into being and it's really quite rewarding.

It's also kind of shocking at this point. I've been working steadily on this project for a little less then two months now but it seems like an eternity. And now, with the ribs done and half of the wood for the rest of the boat is cut and ready, it really seems like the end is in sight! I only have to lash the keelson, chines and stem pieces in, bend and place the masik and cockpit coaming, put the deck stringers on, floorboards in and then I can skin it and do the deck lashings after a coating of the good stuff. So pretty much done, right? Knock on wood.


Now, I've thought that this blog should have lots of pictures so people can come in and see how I'm doing without having to read my ramblings or anything. What could make it better, a video of me! Here's a video of me steam bending one of the replacement ribs!

Friday, September 13, 2013

Ribs!

In the past week, since getting the deck in shape, I have cut and soaked all the ribs for four days or more before trying my hand at steam bending. It's always nice to try new things and this was no exception. I made a nice little steam box out of foam board and duct tape with a couple of nails to hold the sides in place and completed it with my campstove, a kettle, a piece of conduit and two towels. I cut a jig out of a 2x6 though all I needed was a 2x4 and used my belt as the strap to bend with.
I feel like I should have gotten a video of the process because it's so amazing to see it happen. Really, just the last minute, of taking it out of the steam box, bending the rib on the jig and then putting it in its place and the final adjustments. It's amazing how pliable wood can become yet the next morning it's almost as stiff as it's ever been. Some quick shaving off some of them revealed that they're still very wet though, so they should get stiffer and stronger!

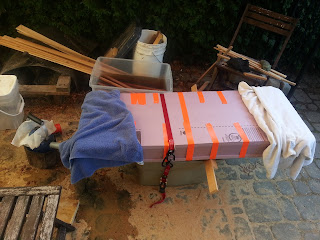
That all being said, here's what she looks like now! She's a real beaut, with a small rocker to her and a low back deck, she should be good for high winds, stormy seas and calm mornings alike as well as a pleasure to roll. I look forward to meeting her on the water!

Now, you might see that some ribs are still missing here. I broke four ribs in the bending process, fixed one of them with some twine and then broke another two in the fine-tuning. This is actually a lot less then I was expecting so I'm pretty stoked. I already have replacements cut and soaking so Tuesday is the next big bending day!

Here's a really sexy photo, though it probably hides some of the mistakes and bad bends that I have since got back and corrected or tried to. This shows the almost last rib in the stern up front and the rest falling into place. I still have the keel and the two chines to lay which will hold the skin off the ribs but you can already see the beautiful shape of the hull to come. You can also see the mortise for rib 25 which broke before it even left the bending table here.

Here's one of my ingenious fixes to a split rib, twining the hell out of it to hold it together. It's like a tensor bandage from the days of auld. I think I'm going to leave them on unless I get told this is a bad idea from an experienced builder. If any of them read this, please comment.
Here's a split rib, beyond rib-air (soo bad). As I said I was expecting this as you can see under my foot there is two twelve foot sections of oak that could be cut into more ribs. Luckily, I don't even need these and they could even become part of the cockpit. Who knows, I may even do other things than kayaksmithing with them.


So the next steps ahead, after actually completing this one, is to fit the stem pieces on to the end. These will extend the boat another 8 inches in either direction and be the shape of the bow and stern. They will be lashed to the ends of the boat after a little planing and to the keelson, which is the very next step, along with the chines. It seems like there's so many steps but each day when I get home from work and I go to the kitchen  to shovel food in to me, I look out to the backyard and can't think of anything else I'd rather do right now then go work on my baby. Even as the days shrink and I feel the autumn cold kiss my feet, every day I can put in two to four hours, sometimes just fifteen minutes but if I get just one jig or mental problem solved, or even just a clean up, it feel so good. The journey here is its own reward so I am in no rush to get her in the water, especially if it means having something less than an awesome boat.